Inside the Workflow
The Newport DEM should now be running.
Keep the terminal visible. You do not need to interpret every message—just recognize the major stages:
discover data
      ↓
prepare each source
      ↓
standardize reference systems
      ↓
prioritize and stack measurements
      ↓
interpolate across multiple scales
      ↓
write the final DEMThe tools working together
| Tool | Main role |
|---|---|
| Fetchez | Orchestrates the recipe and data pipeline |
| Transformez | Supports horizontal and vertical reference transformations |
| Globato | Provides elevation-specific filtering, gridding, and DEM construction |
We launch the build with Globato, while Fetchez coordinates the data pipeline and Transformez supports reference-system transformations.
Our Newport recipe combines:
coupling-bathy-topo
        +
dav:survey_id=9693,weight=100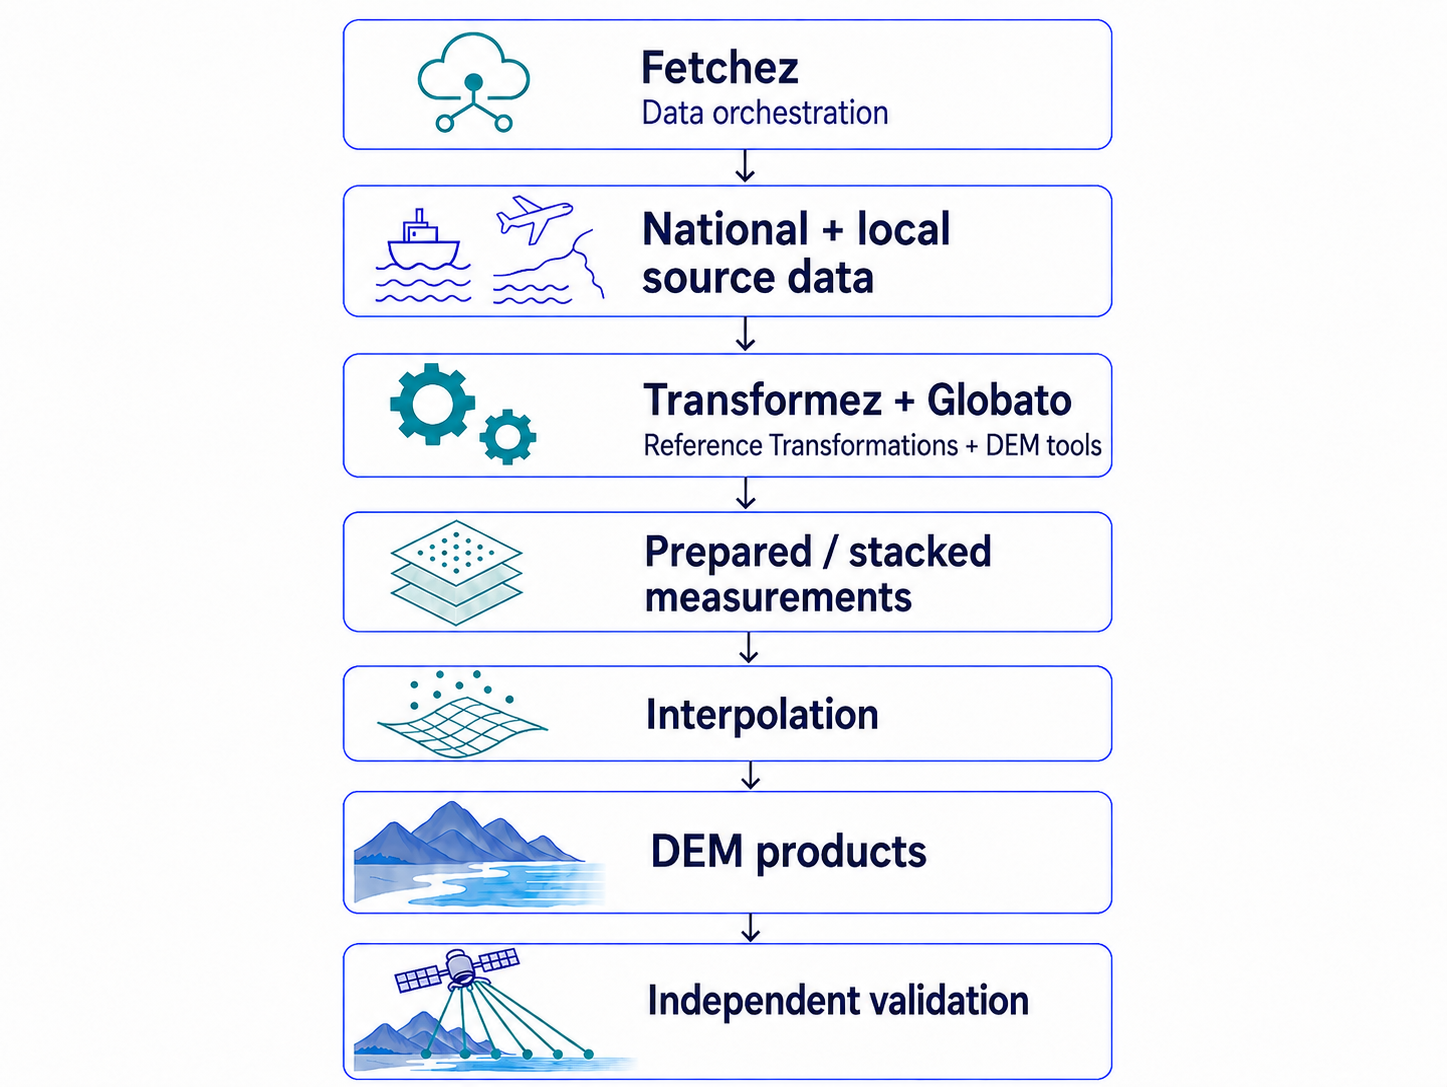
Coastal DEM workflow. The build moves from data discovery through source preparation, reference-system standardization, DEM construction, and final outputs.
1. Discover the data
The workflow first determines which configured sources overlap Newport.
Fetchez provides a common way to work with data from different catalogs, APIs, formats, and providers.
Explore Fetchez
Optional commands for a second terminal:
fetchez modules list
fetchez modules info dav
These let you inspect the available data modules and learn more about a specific module, such as the Digital Coast DAV source.
About the workshop cache
The command uses:
--shared-cache ~/workshop/newport_dataThe workshop setup staged prepared source data there so the build can reuse them rather than download everything again.
~/workshop/newport_data/    → prepared source-data cache
~/workshop/newport_dem/     → processing files and outputs
Messages about reusing cached data are expected.
2. Prepare each source
Coastal elevation datasets are not all equivalent.
A reproducible workflow can process each source appropriately while keeping the overall workflow consistent.
Why does the coastline matter?
A coastal DEM combines measurements collected over both land and water, often from sources with different sensors and data characteristics.
Land/water constraints can help prevent topographic measurements or interpolation from extending inappropriately into bathymetric areas, and vice versa. The coastline is therefore part of the processing logic, not just a map feature.
3. Standardize the reference system
Our target Newport DEM uses:
Horizontal CRS: NAD83 geographic (EPSG:4269)
Vertical CRS: NAVD88 height (EPSG:5703)
Combined reference system:
epsg:4269+5703
Source datasets may arrive in different horizontal or vertical reference systems. Before they can be combined, they need to be expressed in the requested common system.
This is where Transformez supports the workflow.
Why is the vertical datum important?
The same physical location can have different numerical elevations when referenced to different vertical surfaces.
A vertical transformation changes the reference used to describe the elevation, not the physical terrain or seafloor.
Explore Transformez
In a second terminal:
transformez listYou do not need to run transformations manually. Fetchez coordinates the workflow and uses Transformez where needed.
4. Prioritize and stack measurements
Once prepared and standardized, measurements are brought into a common raster framework.
Where datasets overlap, recipe priorities help determine which information should dominate.
For Newport, we added:
dav:survey_id=9693,weight=100so the selected local topobathymetric lidar receives strong priority where it overlaps lower-priority sources.
5. Interpolate across multiple scales
Measurement density can vary dramatically across a coastal region.
Dense lidar can support fine spatial detail, while sparse bathymetric observations require information to be integrated across broader scales.
Use fine spatial information where observations support it, and progressively broader information where measurements are sparse.
6. Write the final outputs
When processing is complete, Globato writes the final DEM and supporting products.
The two primary Newport products are:
~/workshop/newport_dem/newport_n44x64_w124x10_final.tif
~/workshop/newport_dem/newport_n44x64_w124x10_hs.tif
*_final.tif → finished coastal DEM
*_hs.tif → hillshade for visual inspectionIn Module 3, we will also use:
~/workshop/newport_dem/newport_n44x64_w124x10_sm.gpkgThis spatial metadata GeoPackage lets us see which source data support different parts of the DEM.
Other supporting outputs
Globato can also create:
| Output | Purpose |
|---|---|
| Source masks | Show where individual input files contribute |
| Sources VRT | Combines source-data coverage |
| Spatial metadata | GIS view of source support |
| Spatial metadata style | Prepared QGIS symbology |
| Provenance raster | Compact cell-by-cell source provenance |
| Stack raster | Accumulated information used during gridding |
You do not need to inspect all of these during the workshop.
If your build finishes early
Confirm the primary products:
ls -lh \
  ~/workshop/newport_dem/newport_n44x64_w124x10_final.tif \
  ~/workshop/newport_dem/newport_n44x64_w124x10_hs.tif
We will interpret them in Module 3.
One last look at the terminal
Which stage best describes what you see?
discovering or accessing data
preparing or filtering a source
transforming coordinates or elevations
stacking measurements
interpolating across multiple scales
writing final outputs
If your Newport build did not finish
Known-good Newport fallback files are available in:
~/workshop/reference_outputs/newport/If an instructor directs you to use them, stop the running build with Ctrl+C if necessary, then run:
rm -rf ~/workshop/newport_dem
mkdir -p ~/workshop/newport_dem
cp -a ~/workshop/reference_outputs/newport/. ~/workshop/newport_dem/
cd ~/workshop/newport_dem
ls -lh
The fallback set contains:
newport_n44x64_w124x10_final.tif
newport_n44x64_w124x10_hs.tif
newport_n44x64_w124x10_sm.gpkg
newport_n44x64_w124x10_sm.qml
That is enough to continue with Module 3.