Build the Newport DEM
Now we will build our main workshop DEM for Newport, Oregon.
The recipe is simple:
reusable national coastal data
            +
local Newport topobathymetric lidar
            ↓
      Newport coastal DEM
We will start the build here and let it run while we move into Module 2b — Inside the Workflow.
1. Newport study area
Our study area includes Yaquina Bay, the entrance channel, nearby coastal waters, and adjacent topography.
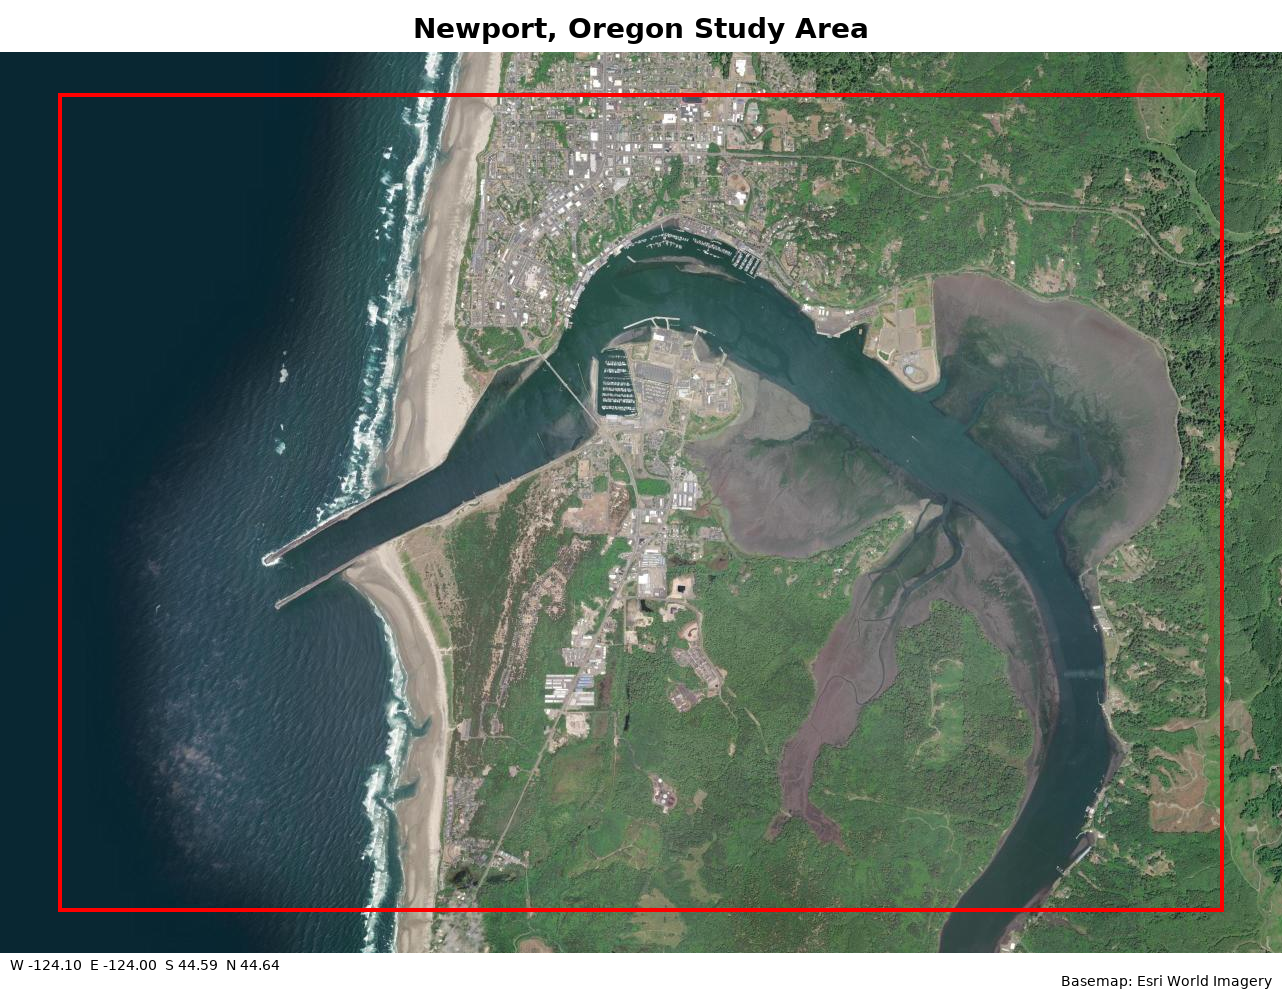
Newport, Oregon Study Area. The red box shows the DEM area.
For this workshop, we will build a 1/9-arc-second DEM using:
Bounds:
-124.10/-124.00/44.59/44.64Horizontal CRS: NAD83 geographic (EPSG:4269)
Vertical CRS: NAVD88 height (EPSG:5703)
Combined reference system:
epsg:4269+5703
2. Start with a national recipe, then add local data
Our reusable national starting recipe is:
coupling-bathy-topoIt combines nationally available coastal elevation sources into a starting point that we can improve with appropriate local data.
For Newport, our question is:
Is there a useful local dataset that would improve the national recipe?
What is in coupling-bathy-topo?
coupling-bathy-topo is a reusable recipe that combines several nationally available topographic and bathymetric data sources.
The exact sources used depend on what data are available in the study area.
To inspect the bundle, run:
fetchez modules bundles info coupling-bathy-topoWe will look more closely at how these sources move through the workflow in Module 2b — Inside the Workflow.
3. Find Newport topobathymetric lidar
NOAA’s Digital Coast Data Access Viewer (DAV) lets us search geographically for coastal lidar.
Open NOAA Digital Coast DAV for Newport
Find the dataset ID
Globato/Fetchez needs the numeric DAV dataset ID.
In the dataset details:
Scroll to Bulk Download.
Click Link to All Dataset Files.
Look at the URL of the page that opens.
Near the end of the URL, you will see:
.../####/index.html
     ↑
 DAV dataset ID
Use that number in:
dav:survey_id=####,weight=100Reveal the Newport dataset
The dataset is:
2020 USACE NCMP Topobathy Lidar: Oregon
DAV dataset ID:
9693Source specification:
dav:survey_id=9693,weight=1004. Build the Newport DEM
We now have the two main data ingredients:
coupling-bathy-topo
        +
dav:survey_id=9693,weight=100
Start with strong nationally available data, then add local scientific data when it improves the DEM.
Run:
globato build \
  -R -124.10/-124.00/44.59/44.64 \
  -X 6:5 \
  -P epsg:4269+5703 \
  -E 0.1111111s \
  -O newport \
  -D ~/workshop/newport_dem \
  --shared-cache ~/workshop/newport_data \
  coupling-bathy-topo \
dav:survey_id=9693,weight=100What does the build command specify?
| Part | Purpose |
|---|---|
-R -124.10/-124.00/44.59/44.64 | Newport study-area bounds |
-X 6:5 | 6 cells of overlap between adjacent DEM tiles; 5% source-data processing buffer |
-P epsg:4269+5703 | NAD83 geographic + NAVD88 height target reference system |
-E 0.1111111s | Output resolution |
-O newport | Output name |
-D ~/workshop/newport_dem | Processing/output directory |
--shared-cache ~/workshop/newport_data | Prepared Newport source-data cache |
coupling-bathy-topo | Reusable national coastal recipe |
dav:survey_id=9693,weight=100 | Local Newport topobathymetric lidar |
The command combines where and how to build the DEM with which data recipe to use.
If the workshop directories are missing
Module 1 should already have prepared the Newport cache and output directory.
If needed, rerun:
bash ~/shared/setup_workshop.shThen confirm:
ls ~/workshopContinue while Newport builds
Keep the Newport terminal running and move to:
Module 2b — Inside the Workflow
There we will connect the messages appearing in the terminal to the major processing stages.